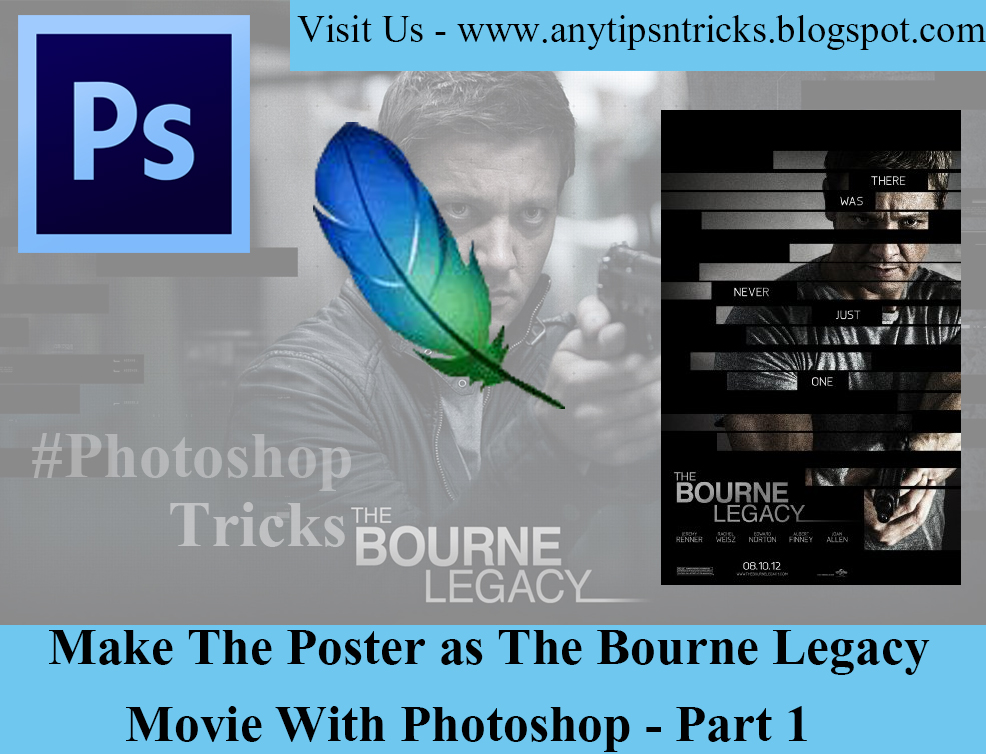
Hi friends! Today I'm talk about How to make the poster as Bourne Legacy Movie with Photoshop. This is my first post about Photoshop because I hope your Comment, Proposals and Angers. So let's Start.
Step 1
First, open your photo with Photoshop.
File > OpenUse one of these for a good image quality resolution because To our successful outcome.
Step 2
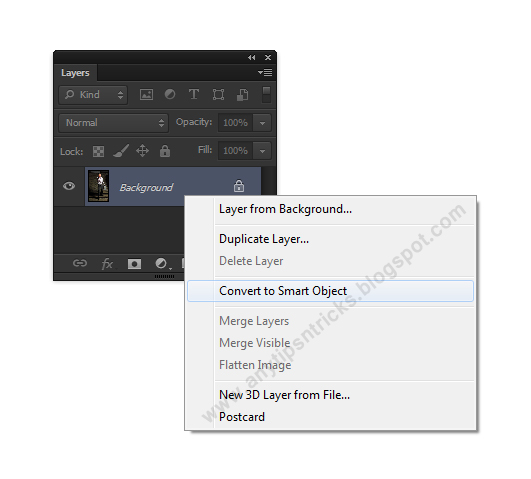
Now, Right Click on Background Layer and click Convert to Smart Object. Most easier to work through Smart Object for future. This will convert all the things inside it like a Group, Smart Object lets us manipulate a single object. Like what you 'll find going through experience.
Step 3
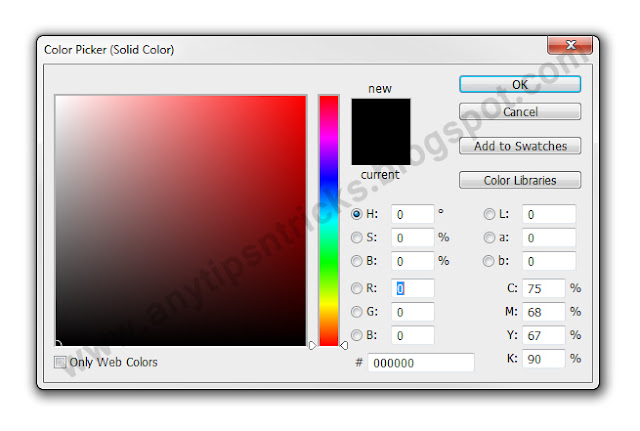
We are now trying to create a new Fill Layer made black Color layer below our photo. For it go below path.
Layer > New Fill Layer > Solid Color
Now coming to Color Picker and select black color on it.
Step 4
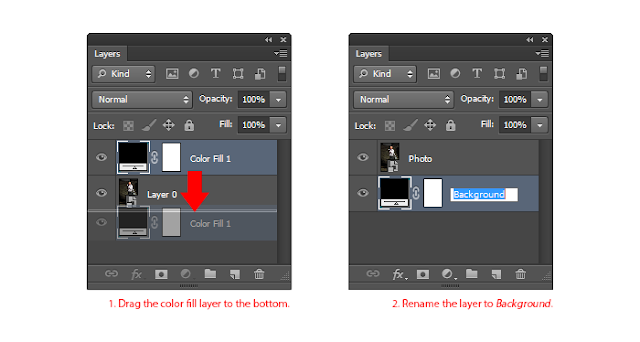
Now go Layer Palette (Window > Layers) and We change the Fill color to black layer Drag the bottom. Double Click on that Layer text and it rename to Background. Doing that find layers easily.
Step 5
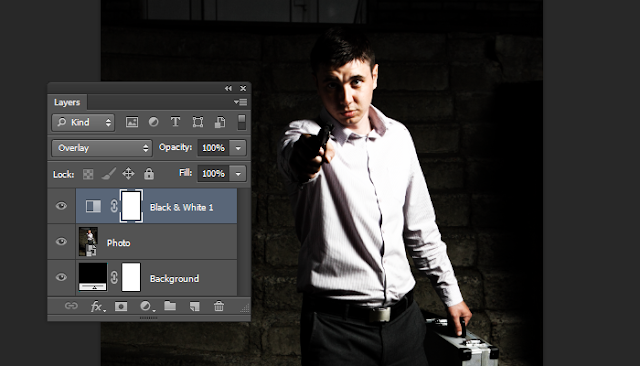
Next we'll doing, Add a Photo Effect to our photo to Using Adjustment Layers and Filters. For this we need to create a black and white adjustment layer. For it go below path.
Layer > New Adjustment Layer > Black & WhiteNow change this layer Blending Mode to Overlay. Now make the settings to suit your picture through the Properties panel ( Window > Properties )
Step 6
Now we need to add a Vibrance Adjustment Layer.
Layer > New Adjustment Layer > Vibrance
Now we need one more to reduce the vibrance. Looking down image to for an idea.

This is how we see it , we 'll reduce vibrance.

Step 7
Some things just do not see us give a kind of strange appearance of adjustment layers. If you want to continue like this in this way can hold. Select Photo Layer from Layer Panel and choose this path.
Image > Adjustments > Shadows/Highlights
Shadows = 35%
Highlights = 15%
The values given can change to suit your picture.
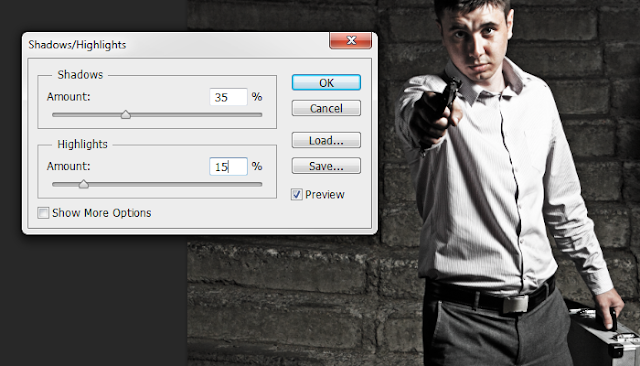
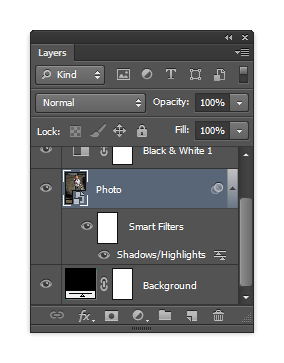
Now you just look at the layer palette you will see that we did together adjustment as a Smart Filter. Because we changed the image into a Smart Object. Now the Smart Filter on the settings you can change anytime without problem. This is another advantage of Smart Object.
Step 8
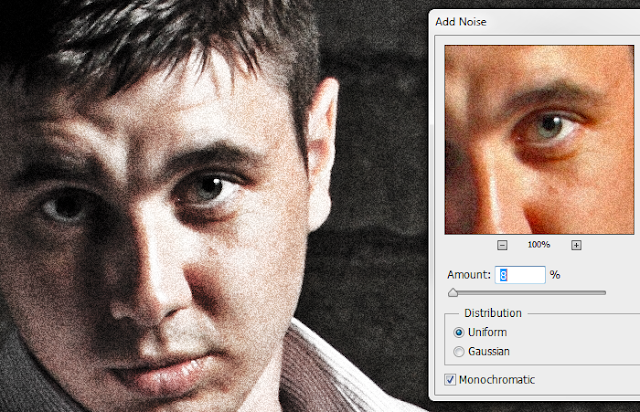
Now we're going to add Noise filter to photo. Also as previously applied as a Smart filter. Now select Photo Layer and go this path.
Filter > Noise > Add Noise
Now tick (✔) the Monochromatic and click Ok. ☺
Step 9
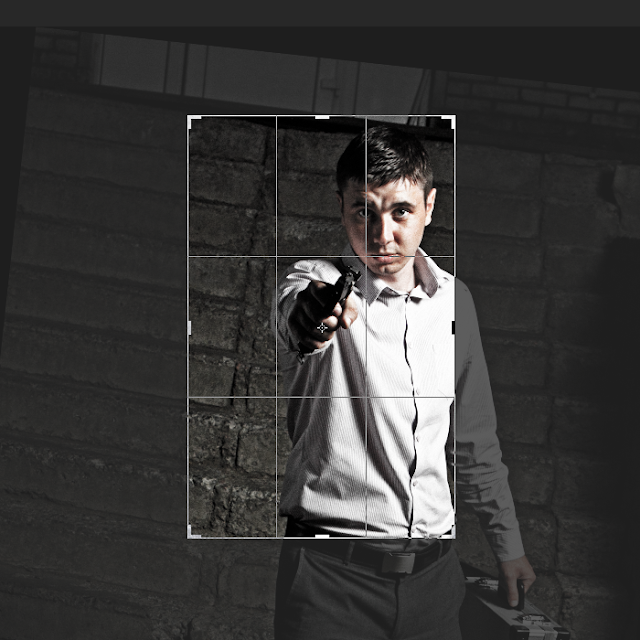
Now we're going to the image crop and rotate. Select the Crop Tool (c). Now over on the right side of our options bar, remove tick mark of "Delete Cropped Pixels". This we can change back to the Crop at any time. Now Crop your image and press Enter key.
Step 10
Now we're going to add some text. You can choose font, match for this. The font that used is Arial. Click on the top layer in layer palette have been using the text tool to add Text 's places you want.
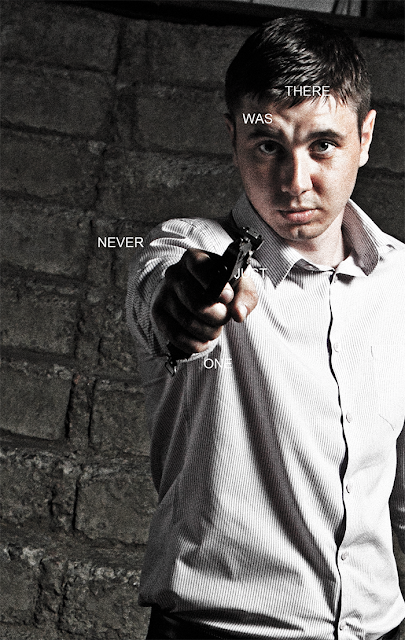
Part 1 is Over here. See you from Part 2.
We are sure that you would have loved this post. If you have any question comment in the comment box. You suggestion may help any of our reader out there.
Was it helpful? Then do share it to praise our work and to help others.
We are sure that you would have loved this post. If you have any question comment in the comment box. You suggestion may help any of our reader out there.
Was it helpful? Then do share it to praise our work and to help others.


0 comments:
Post a Comment
Leave a Comment to praise our work !